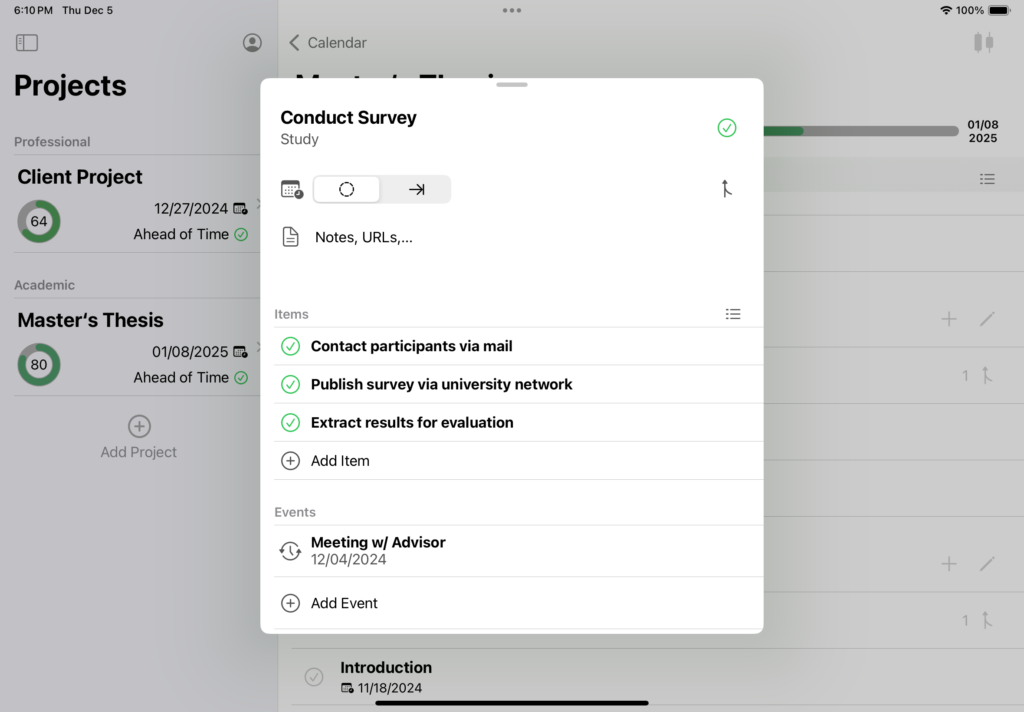
After you have created a new project in planimbAI, it’s time to populate it by adding some tasks. planimbAI supports up to 5 different task areas per project to model independent or parallel workflows. Tap the ‘+’ button next to the name of a task area to add a new task to it. A sheet will appear that allows you to configure all the details.

Enter a name for your task at the top. The corresponding task area is displayed below. The checkbox in the top right corner allows you to mark the task including all its items as complete. You may choose to uncheck a task at any point, which will leave its items marked as complete.
Below, you can see a control for adding a due date to your task. The dashed circle on the left indicates no due date is active for that task. Move the slider right to enable a date picker for the task’s due date. You can delete the due date by moving the slider back to the dashed circle. Right next to the due date selector is a vertical arrow, indicating the number of other tasks that this task depends on. You can add or remove dependencies between tasks on the diagram view. Tap the arrow icon to quickly delete all dependencies of this task.
Right below you can add notes and, most importantly, define to-do items for your task. We recommend that you add as many fine-grained items as possible to each task to represent the actual steps to complete. At the bottom, you may add events like for, instance, a regular meeting associated with that task. Deleting a task is possible on the project overview by sliding left on the task’s row.